Using Layouts
Layouts allow you to easily manage UI elements that are commonly used across multiple pages. By configuring common components like headers, navigation bars, and footers as layouts, you can reduce code duplication and provide a consistent user experience.
Creating Layout Files
Layouts can be implemented by creating a _layout.tsx file. The scope of application varies depending on the location of this file.
import { PropsWithChildren } from 'react';

export default function Layout({ children }: PropsWithChildren) {
  return <>{children}</>;
}
Layout Application Scope
Layouts are applied to different scopes depending on their file location.
pages/_layout.tsx: Applies to all pagespages/about/_layout.tsx: Applies to all pages under<scheme>://{serviceName}/about
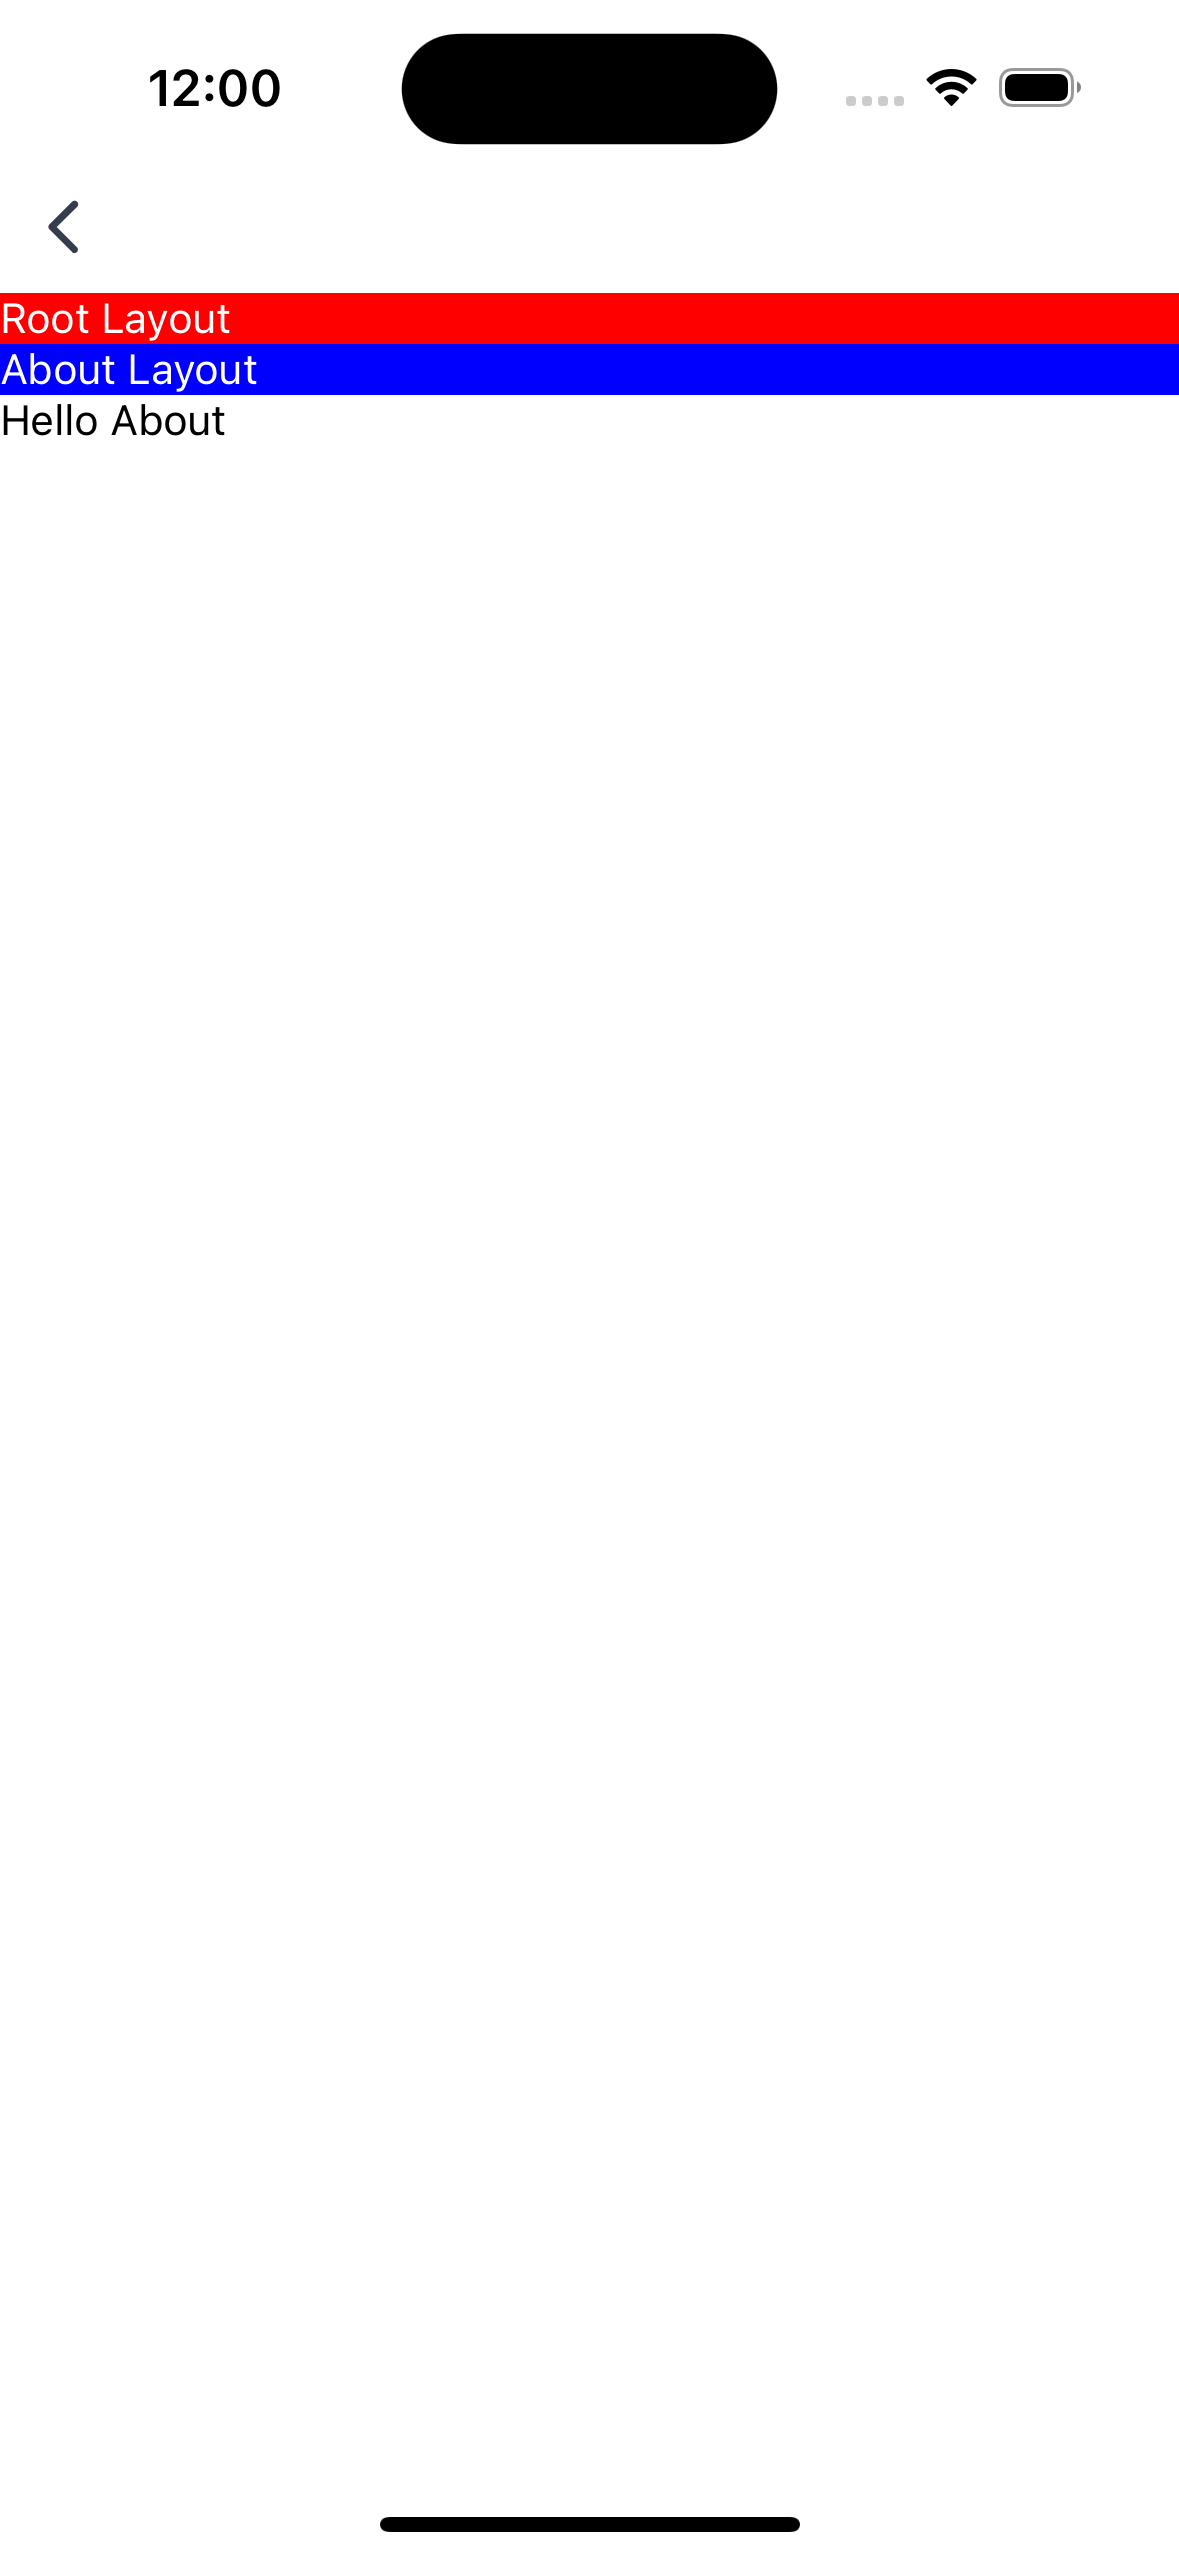
Layouts can be nested. When multiple layouts are applied to a page, they are applied sequentially starting from the parent directory.
pages/
├── _layout.tsx          // Global layout
├── about/
│   ├── _layout.tsx     // about section layout
│   ├── index.tsx       // about main page
│   └── team.tsx        // team introduction page
└── index.tsx           // Main page
For example, with the _layout.tsx structure above, the about/team.tsx page will have layouts applied in the following order:
pages/_layout.tsx(Top-level layout)pages/about/_layout.tsx(about section layout)pages/about/team.tsx(Actual page component)
By nesting layouts in this way, you can effectively configure UI elements that are needed globally and those that are only needed in specific sections.
Layout Examples
Global Layout
Create a layout that applies to all pages.
import { PropsWithChildren } from 'react';
import { View } from 'react-native';
import { Header } from '../components/Header';
import { Footer } from '../components/Footer';

export default function Layout({ children }: PropsWithChildren) {
  return (
    <View style={{ flex: 1 }}>
      <Header />
      {children}
      <Footer />
    </View>
  );
}import { View, Text, StyleSheet } from 'react-native';
export function Header() {
return (
<View style={styles.header}>
<Text style={styles.title}>My App</Text>
<View style={styles.nav}>
<Text style={styles.navItem}>Home</Text>
<Text style={styles.navItem}>About</Text>
<Text style={styles.navItem}>Settings</Text>
</View>
</View>
);
}
const styles = StyleSheet.create({
header: {
padding: 16,
backgroundColor: '#ffffff',
borderBottomWidth: 1,
borderBottomColor: '#e5e5e5',
},
title: {
fontSize: 24,
fontWeight: 'bold',
marginBottom: 8,
},
nav: {
flexDirection: 'row',
gap: 16,
},
navItem: {
fontSize: 16,
color: '#666666',
},
});import { View, Text, StyleSheet } from 'react-native';
export function Footer() {
return (
<View style={styles.footer}>
<Text style={styles.copyright}>© 2024 My App. All rights reserved.</Text>
</View>
);
}
const styles = StyleSheet.create({
footer: {
padding: 16,
backgroundColor: '#f5f5f5',
alignItems: 'center',
},
copyright: {
fontSize: 14,
color: '#666666',
},
});Section-Specific Layout
Create a layout that applies only to a specific section.
import { PropsWithChildren } from 'react';
import { View } from 'react-native';
import { AboutSidebar } from '../../components/AboutSidebar';

export default function AboutLayout({ children }: PropsWithChildren) {
  return (
    <View style={{ flexDirection: 'row' }}>
      <AboutSidebar />
      <View style={{ flex: 1 }}>{children}</View>
    </View>
  );
}import { View, Text, StyleSheet } from 'react-native';
export function AboutSidebar() {
return (
<View style={styles.sidebar}>
<Text style={styles.title}>About</Text>
<View style={styles.menu}>
<Text style={styles.menuItem}>Company Introduction</Text>
<Text style={styles.menuItem}>Team Introduction</Text>
<Text style={styles.menuItem}>History</Text>
<Text style={styles.menuItem}>Directions</Text>
</View>
</View>
);
}
const styles = StyleSheet.create({
sidebar: {
width: 200,
padding: 16,
backgroundColor: '#f8f9fa',
borderRightWidth: 1,
borderRightColor: '#e5e5e5',
},
title: {
fontSize: 20,
fontWeight: 'bold',
marginBottom: 16,
},
menu: {
gap: 12,
},
menuItem: {
fontSize: 16,
color: '#495057',
},
});Getting Query Parameters in Layouts
To get query parameters in a layout, you can use the useParams hook. useParams reads the parameters of the current screen and returns them as an object.
useParams Hook Usage Example
The following is an example of using the useParams hook in a _layout.tsx file. It dynamically displays a title at the top of the screen based on the title value passed as a URL query parameter.
import { useParams } from '@granite-js/react-native';
import { PropsWithChildren } from 'react';
import { View, Text } from 'react-native';

export default function Layout({ children }: PropsWithChildren) {
  // Get the parameters of the current screen.
  const params = useParams({ strict: false });

  // Get the 'title' parameter and set a default value.
  const title = params?.title ?? 'Default Title';

  return (
    <View style={{ flex: 1 }}>
      {/* Dynamically generated header */}
      <View style={{ padding: 16, backgroundColor: '#f0f0f0' }}>
        <Text style={{ fontSize: 20, fontWeight: 'bold' }}>{title}</Text>
      </View>
      {/* Render child components */}
      <View style={{ flex: 1 }}>{children}</View>
    </View>
  );
}