Navigating Screens
Granite Router makes it easy to handle routing tasks such as navigating to new screens in your application or controlling screen history.
We'll explain various routing features using the example code below.
INFO
Granite Router operates based on React Navigation.
Example Code
The example code consists of a total of 3 pages, and the structure is as follows:
root
├─── pages
│    ├─── page-a.tsx
│    ├─── page-b.tsx
│    └─── page-c.tsx
└─── src
     └─── ...
page-a.tsx Source Code
// page-a.tsx
import { StyleSheet, View, Text, Pressable } from 'react-native';
import { createRoute, useNavigation } from '@granite-js/react-native';

export const Route = createRoute('/page-a', {
  validateParams: (params) => params,
  component: PageA,
});

function PageA() {
  const navigation = useNavigation();

  const handlePress = () => {
    navigation.navigate('/page-b');
  };

  return (
    <View style={[styles.container, { backgroundColor: '#3182f6' }]}>
      <Text style={styles.text}>Page A</Text>
      <Pressable onPress={handlePress}>
        <Text style={styles.buttonLabel}>Go to Page B</Text>
      </Pressable>
    </View>
  );
}

const styles = StyleSheet.create({
  container: {
    flex: 1,
    justifyContent: 'center',
    alignItems: 'center',
    gap: 16,
    padding: 16,
  },
  text: {
    color: 'white',
    fontSize: 24,
  },
  buttonLabel: {
    color: 'white',
  },
});
page-b.tsx Source Code
// page-b.tsx
import { createRoute, useNavigation } from '@granite-js/react-native';
import { StyleSheet, View, Text, Pressable } from 'react-native';

export const Route = createRoute('/page-b', {
  validateParams: (params) => params,
  component: PageB,
});

function PageB() {
  const navigation = useNavigation();

  // Function to go back to the previous screen.
  const handlePressBackButton = () => {
    if (navigation.canGoBack()) {
      navigation.goBack();
    } else {
      console.warn('Cannot go back to the previous screen.');
    }
  };

  const handlePressNextButton = () => {
    navigation.navigate('/page-c', {
      message: 'Hello!',
      date: new Date().getTime(),
    });
  };

  return (
    <View style={[styles.container, { backgroundColor: '#fe9800' }]}>
      <Text style={styles.text}>Page B</Text>
      <Pressable onPress={handlePressBackButton}>
        <Text style={styles.buttonLabel}>Go Back</Text>
      </Pressable>
      <Pressable onPress={handlePressNextButton}>
        <Text style={styles.buttonLabel}>Go to Page C</Text>
      </Pressable>
    </View>
  );
}

const styles = StyleSheet.create({
  container: {
    flex: 1,
    justifyContent: 'center',
    alignItems: 'center',
    gap: 16,
    padding: 16,
  },
  text: {
    color: 'white',
    fontSize: 24,
  },
  buttonLabel: {
    color: 'white',
  },
});
page-c.tsx Source Code
// page-c.tsx
import { createRoute, useNavigation } from '@granite-js/react-native';
import { CommonActions } from '@granite-js/react-native/native/@react-navigation/native';
import { StyleSheet, View, Text, Pressable } from 'react-native';

export const Route = createRoute('/page-c', {
  validateParams: (params) => params as { message: string; date: number },
  component: PageC,
});

function PageC() {
  const navigation = useNavigation();
  const params = Route.useParams();

  const handlePressHomeButton = () => {
    navigation.dispatch((state) => {
      return CommonActions.reset({
        ...state,
        index: 0,
        routes: state.routes.filter((route) => route.name === '/page-a'),
      });
    });
  };

  return (
    <View style={[styles.container, { backgroundColor: '#f04452' }]}>
      <Text style={styles.text}>{params.message}</Text>
      <Text style={styles.text}>{params.date}</Text>
      <View style={styles.line} />
      <Text style={styles.text}>Page C</Text>
      <Pressable onPress={handlePressHomeButton}>
        <Text style={styles.buttonLabel}>Go to Home</Text>
      </Pressable>
    </View>
  );
}

const styles = StyleSheet.create({
  container: {
    flex: 1,
    justifyContent: 'center',
    alignItems: 'center',
    gap: 16,
    padding: 16,
  },
  text: {
    color: 'white',
    fontSize: 24,
  },
  buttonLabel: {
    color: 'white',
  },
});
Page A: Navigating Screens
useNavigation is used to handle navigation between screens. With the navigate method, you can pass the path of the screen to navigate to and any necessary data.
// page-a.tsx
import { createRoute, useNavigation } from '@granite-js/react-native';
import { StyleSheet, View, Text, Pressable } from 'react-native';

export const Route = createRoute('/page-a', {
  validateParams: (params) => params,
  component: PageA,
});

function PageA() {
  const navigation = useNavigation();

  const handlePress = () => {
    navigation.navigate('/page-b');
  };

  return (
    <View style={[styles.container, { backgroundColor: '#3182f6' }]}>
      <Text style={styles.text}>Page A</Text>
      <Pressable onPress={handlePress}>
        <Text style={styles.buttonLabel}>Go to Page B</Text>
      </Pressable>
    </View>
  );
}

const styles = StyleSheet.create({
  container: {
    flex: 1,
    justifyContent: 'center',
    alignItems: 'center',
    gap: 16,
    padding: 16,
  },
  text: {
    color: 'white',
    fontSize: 24,
  },
  buttonLabel: {
    color: 'white',
  },
});
Key Points
- Get the
navigationobject using theuseNavigationhook. - Calling
navigation.navigate('/page-b')navigates to 'Page B'.
Page B: Going Back to the Previous Screen

You can use the goBack method to return to the previous screen. However, an error may occur if there is no previous screen history, so you should first check with canGoBack.
// page-b.tsx
import { createRoute, useNavigation } from '@granite-js/react-native';
import { StyleSheet, View, Text, Pressable } from 'react-native';

export const Route = createRoute('/page-b', {
  validateParams: (params) => params,
  component: PageB,
});

function PageB() {
  const navigation = useNavigation();

  // Function to go back to the previous screen.
  const handlePressBackButton = () => {
    if (navigation.canGoBack()) {
      navigation.goBack();
    } else {
      console.warn('Cannot go back to the previous screen.');
    }
  };

  const handlePressNextButton = () => {
    navigation.navigate('/page-c', {
      message: 'Hello!',
      date: new Date().getTime(),
    });
  };

  return (
    <View style={[styles.container, { backgroundColor: '#fe9800' }]}>
      <Text style={styles.text}>Page B</Text>
      <Pressable onPress={handlePressBackButton}>
        <Text style={styles.buttonLabel}>Go Back</Text>
      </Pressable>
      <Pressable onPress={handlePressNextButton}>
        <Text style={styles.buttonLabel}>Go to Page C</Text>
      </Pressable>
    </View>
  );
}

const styles = StyleSheet.create({
  container: {
    flex: 1,
    justifyContent: 'center',
    alignItems: 'center',
    gap: 16,
    padding: 16,
  },
  text: {
    color: 'white',
    fontSize: 24,
  },
  buttonLabel: {
    color: 'white',
  },
});
Key Points
- Check if there is a previous screen with
canGoBack(), and if so, callgoBack(). - Navigate to 'Page C' while passing data with
navigate('/page-c', { message: 'Hello!', date: new Date().getTime() }).
Page C: Using Received Data
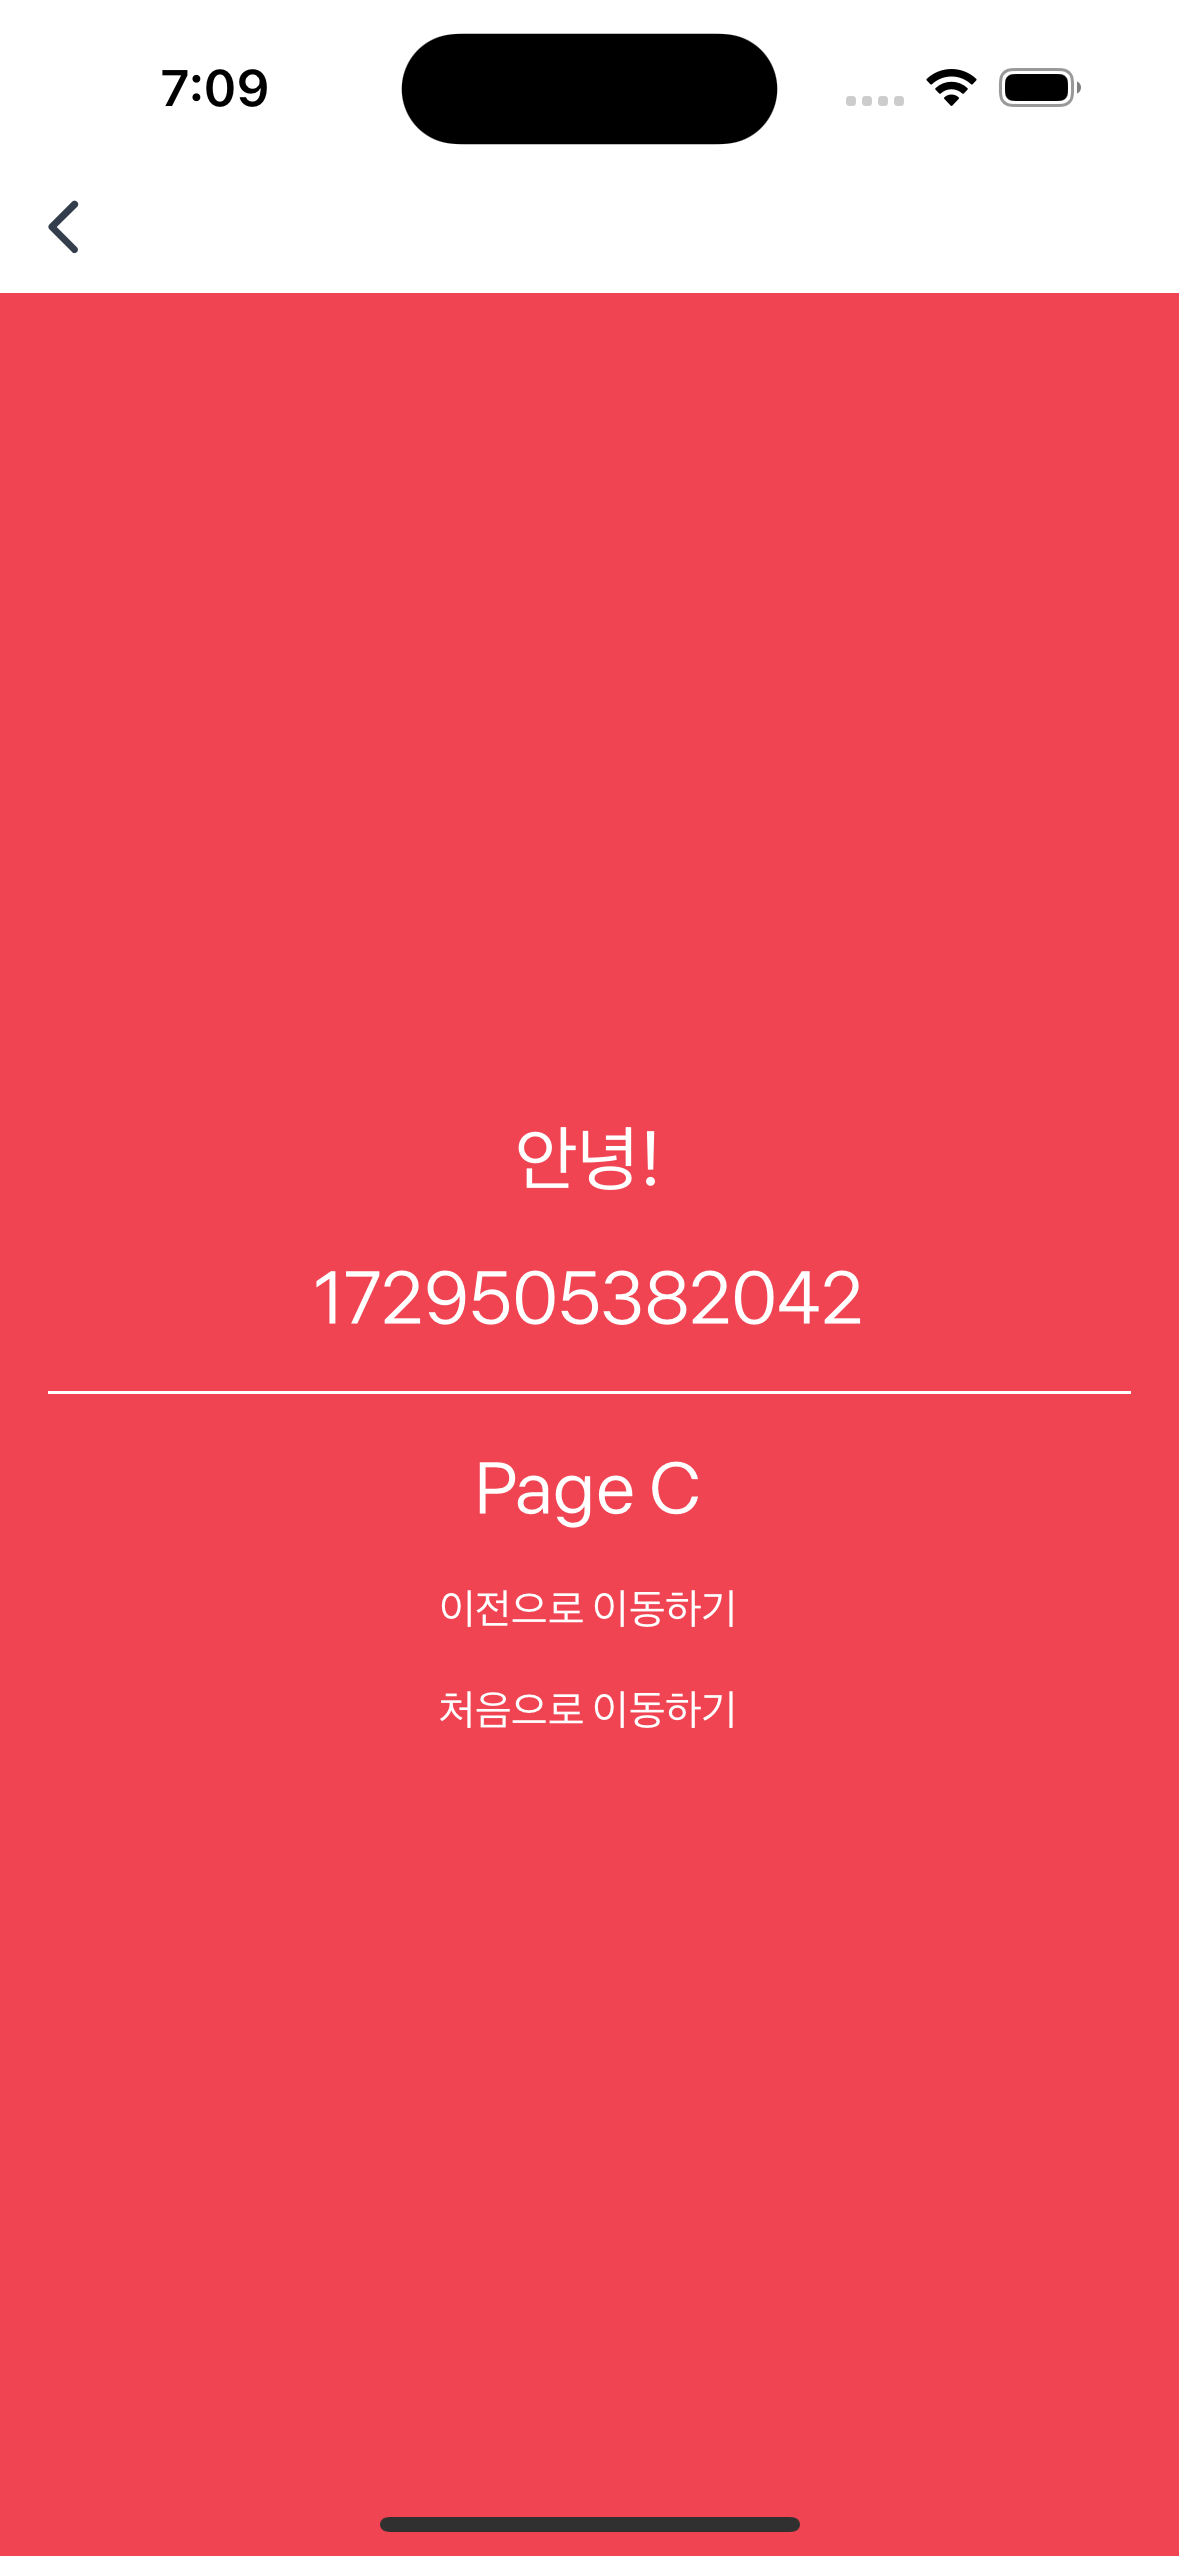
The Route.useParams hook is used to get data passed from other screens.
At this time, if you set the createRoute.validateParams option, you can access the passed data while type-checking it (Type-Safe). This helps prevent errors due to incorrect data formats.
// page-c.tsx
import { createRoute, useNavigation } from '@granite-js/react-native';
import { CommonActions } from '@granite-js/react-native';
import { StyleSheet, View, Text, Pressable } from 'react-native';

export const Route = createRoute('/page-c', {
  validateParams: (params) => params as { message: string; date: number },
  component: PageC,
});

function PageC() {
  const navigation = useNavigation();
  const params = Route.useParams();

  const handlePressHomeButton = () => {
    navigation.dispatch((state) => {
      return CommonActions.reset({
        ...state,
        index: 0,
        routes: state.routes.filter((route) => route.name === '/page-a'),
      });
    });
  };

  return (
    <View style={[styles.container, { backgroundColor: '#f04452' }]}>
      <Text style={styles.text}>{params.message}</Text>
      <Text style={styles.text}>{params.date}</Text>
      <View style={styles.line} />
      <Text style={styles.text}>Page C</Text>
      <Pressable onPress={handlePressHomeButton}>
        <Text style={styles.buttonLabel}>Go to Home</Text>
      </Pressable>
    </View>
  );
}

const styles = StyleSheet.create({
  container: {
    flex: 1,
    justifyContent: 'center',
    alignItems: 'center',
    gap: 16,
    padding: 16,
  },
  text: {
    color: 'white',
    fontSize: 24,
  },
  buttonLabel: {
    color: 'white',
  },
});
Key Points
- Use the
Route.useParamshook to access data (parameters) passed from the URL. - Set the
createRoute.validateParamsoption to safely use data by type-checking it (Type-Safe).
Defining Screen Parameter Types
Define a Route component like the one below for each page. Here, the validateParams option defines the type of parameters that the screen will receive.
export const Route = createRoute('/page-c', {
  validateParams: (params) => params as { message: string; date: number },
  component: PageC,
});
In the code above, validateParams defines the type of parameters to include two fields: message and date.
This allows other code using useNavigate or useParams to clearly know the required path and the data to be passed through type checking. This improves code safety and readability.
Resetting Routing State

The state immediately after navigating in the order of Page A → Page B → Page C can be represented as shown in the figure below.
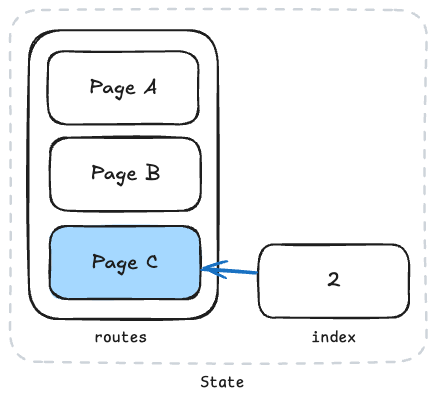
Page A, Page B, and Page C remain in the routes history in order, and the index value points to 2, which is the position of the last navigated page, Page C.
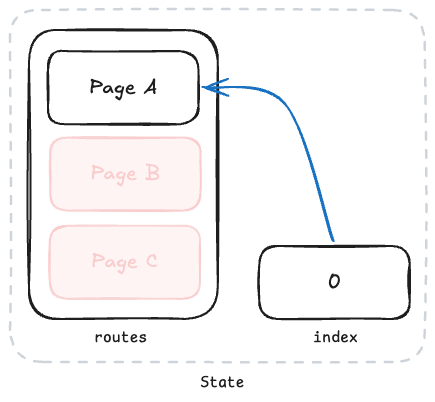
You can use reset to initialize the screen navigation history. For example, if you want to go back to 'Page A' after navigating 'Page A → B → C' and delete the B and C history, use CommonActions.reset.
navigation.dispatch(
  CommonActions.reset({
    index: 0,
    routes: [{ name: '/page-a' }],
  })
);
Key Points
- Use
CommonActions.resetto keep only a specific screen in the history and delete the rest of the screen history.
References
Using React Navigation in this way makes it easy to handle navigation between screens, and you can implement various UX features through functions for passing data or manipulating history. Also, using it with TypeScript allows you to write safe and robust code.