Deploy & Run Your Granite App
Get your app live on AWS in 5 minutes.
What Happens When You Deploy
- Upload optimized bundles to your AWS S3 bucket
- Distribute globally via CloudFront CDN
- Update apps instantly
⏱️ Estimated time: 5 minutes
📱 Result: Your app running live from AWS CDN
Prerequisites
Make sure you've completed these guides first:
- Getting Started - Your Granite app is built and working
- Setting Up AWS Infrastructure - Your AWS CDN is set up and running
1. Build Your Production App
First, let's build your Granite app for production. Run this command in your project directory:
npm run buildpnpm run buildyarn buildGranite will create optimized microservice bundles, and your optimized bundles are now in the dist/ directory:
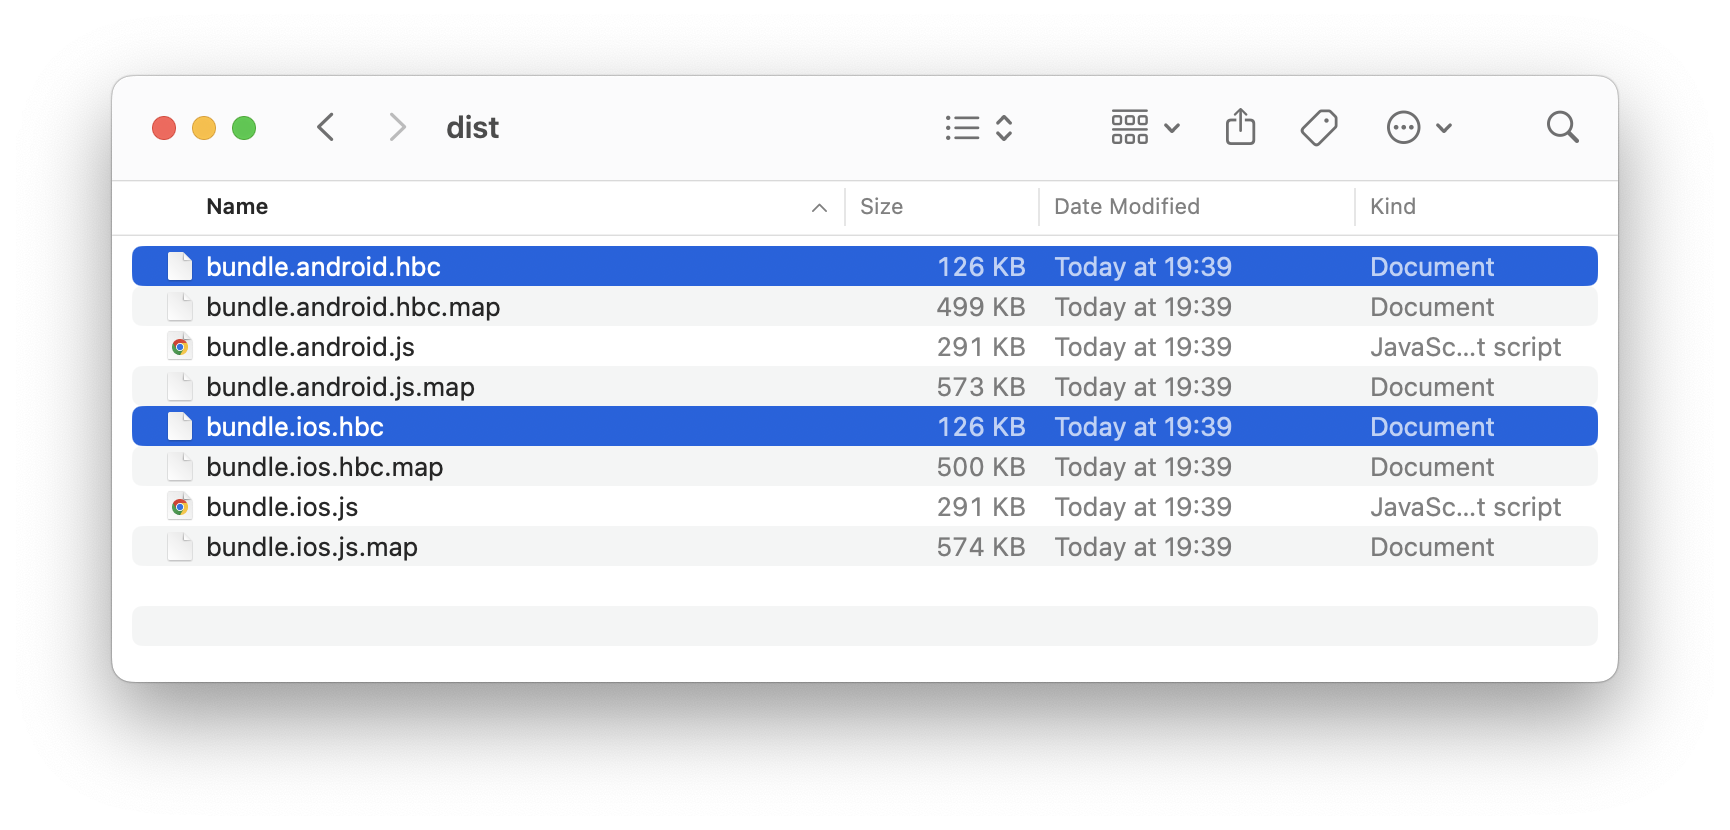
✅ Success indicator: You see built bundles, with sizes under 300KB each
2. Install Granite Forge CLI
Next, install the Granite Forge CLI - this tool helps you deploy your bundles to AWS:
npm install @granite-js/forge-cli --save-devpnpm add @granite-js/forge-cli --save-devyarn add @granite-js/forge-cli --dev3. Deploy Your App
With the S3 bucket set up from the AWS infrastructure guide, let's deploy your app.
npx granite-forge deploy --bucket {Your S3 Bucket Name}pnpm granite-forge deploy --bucket {Your S3 Bucket Name}yarn granite-forge deploy --bucket {Your S3 Bucket Name}You'll see the deployment progress:
$ npx granite-forge deploy --bucket {Your bucket name}
┌  Start deployment
│
◇  Successfully fetched current deployment state
│
▲  No deployment state found
│
◇  Are you sure you want to deploy test-granite-app?
│  Yes
│
◇  Bundle uploaded
│
◇  Bundle list updated
│
◇  Deployed successfully! (Deployment ID: **********************)
│
└  Done
✅ Success indicator: You see "Done"
4. Test Your Granite App
Now that your app is deployed, let's test it out using the Granite test app.
Open the Granite test app on your simulator and enter the following information:
| Field | What to Enter |
|---|---|
| Host | The CDN URL from your AWS infrastructure deployment (you can check it in the output of the infrastructure deployment) |
| URL Scheme | Your app's URL scheme in the format: {your-scheme}://{your-app-name} (these values come from your Granite config) |
Finding your scheme and app name
These values are defined in your granite.config.ts file. Let's take a look at how to find them:
import { defineConfig } from '@granite-js/react-native/config';

export default defineConfig({
  // Example execution scheme: granite://showcase
  scheme: 'granite',
  appName: 'showcase',
  plugins: [
    // ...
  ],
});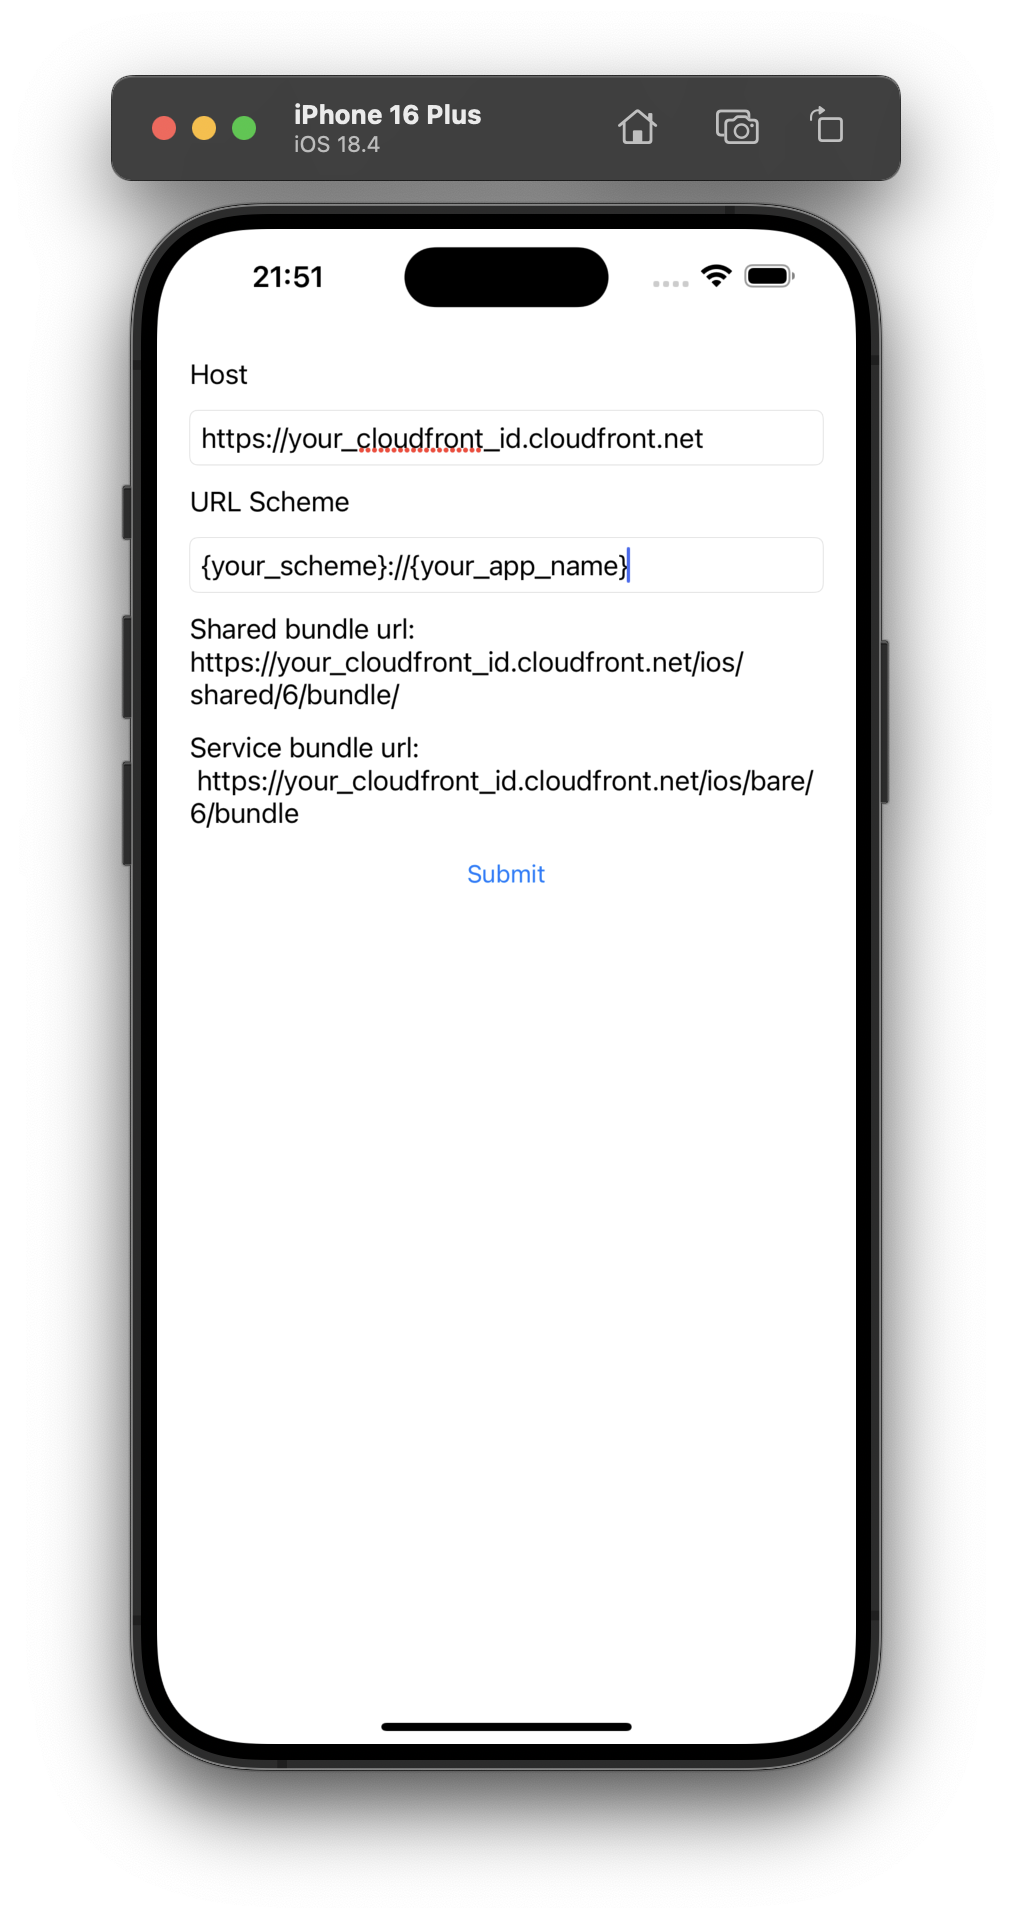
Click Submit and watch your app load instantly from your AWS infrastructure! Your app is now being served through a global CDN, ready for users worldwide. 🌍
Example Videos
| iOS | Android |
|---|---|
Understanding Deployment URLs
Your app is deployed to specific URLs based on platform and version:
URL Structure
https://<your-cdn>/[platform]/[appName]/[version]/bundleExample URLs
# iOS bundles
https://d1234567890123.cloudfront.net/ios/my-granite-app/100/bundle

# Android bundles
https://d1234567890123.cloudfront.net/android/my-granite-app/100/bundle
Version Numbers (1-1000)
Version numbers control what percentage of users get your app update, from 0% to 100% of your user base, with 0.1% granularity.
🎉 Congratulations!
Your Granite app is now live on AWS! Here's what you can do now:
- Update instantly - Deploy new versions by single CLI command
- Global performance - Your app loads worldwide via CDN